Check the system requirements here.
Download the latest version at: http://www.4team.biz/ download.asp and save the downloaded file to an easy-to-find location.
Install the product by clicking on the downloaded setup file.
Follow the installation instructions that can be found here.
Choose between two main scenarios and read more from the links provided: sharing Outlook folders with other participants or synchronizing your Outlook data between your own personal PCs.
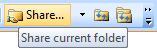
Select a folder that you want to share/synchronize and click the "Share..." button on the Microsoft Outlook Toolbar. Sharing Wizard will start.
Follow the Wizard instructions (Add sharers, Change access rights, Adjust Filters). For advanced sharing settings check the box "Set up other advanced sharing settings" in the second step. Use the "Next" button to go to the next step.
Repeat 5-7 for each folder you want to share/synchronize or use the management panel for more sharing and user access rights options.
Click the "Send/Receive All" button from the Outlook toolbar or Tools menu. Your information will be sent to other participants.
Forward the installation setup file or downloadable link to participants or to your other PCs and install the product. Open Outlook and click "Send and Receive". After the data e-mails arrive, a special invitation form will appear. Choose a shared folders structure that fits your current scenario and accept it. The shared data will be placed in the chosen folders. You may have to wait a while to receive all the shared data (click "Send and Receive" one more time). For troubleshooting, click here.